Connecting to your Raspberry Pi remotely using SSH (Secure Shell) is an essential skill for anyone managing a Raspberry Pi from a distance. Whether you're a hobbyist, developer, or professional, mastering SSH can significantly enhance your ability to manage your devices efficiently.
SSH is a cryptographic network protocol that allows secure communication over an unsecured network. With SSH, you can execute commands and transfer files between devices without compromising security. This guide will walk you through the steps to set up and use SSH for remote access to your Raspberry Pi.
By the end of this article, you'll have a solid understanding of how to SSH into your Raspberry Pi remotely, troubleshoot common issues, and enhance your security measures. Let's dive in!
Read also:Sophie Rain Erome Latest News Updates Discover The Rising Star In The Modeling World
Table of Contents
- Introduction to SSH
- Setting Up Your Raspberry Pi for SSH
- Enabling SSH on Raspberry Pi
- Connecting to Raspberry Pi via SSH
- Handling Dynamic IP Addresses
- Configuring Port Forwarding
- Enhancing SSH Security
- Common Issues and Troubleshooting
- SSH Tools and Clients
- Conclusion
Introduction to SSH
SSH, or Secure Shell, is a protocol that provides a secure way to access a remote computer or server. It encrypts all data exchanged between the client and server, ensuring that sensitive information remains protected. When working with a Raspberry Pi, SSH is often used to access the device without needing physical access.
Understanding SSH is crucial because it allows users to manage their Raspberry Pi remotely, whether it's for programming, file transfers, or monitoring purposes. This section will explain the basics of SSH and why it's essential for Raspberry Pi users.
Setting Up Your Raspberry Pi for SSH
Before you can SSH into your Raspberry Pi, you need to ensure that the device is properly set up. Follow these steps to prepare your Raspberry Pi for remote access:
Initial Setup
1. Install the latest version of Raspberry Pi OS on your device.
2. Connect your Raspberry Pi to a monitor, keyboard, and mouse for initial configuration.
3. Connect the Raspberry Pi to your local network via Wi-Fi or Ethernet.
Read also:Listcrawler Arrest Suspected Crimes And Charges Explained
Checking the IP Address
To connect to your Raspberry Pi via SSH, you'll need its IP address. Here's how you can find it:
- Open the terminal on your Raspberry Pi.
- Type the command:
hostname -I. - This will display the IP address of your Raspberry Pi.
Enabling SSH on Raspberry Pi
SSH is disabled by default on Raspberry Pi OS for security reasons. To enable it, follow these steps:
- Open the Raspberry Pi Configuration tool:
sudo raspi-config. - Select "Interfacing Options" and navigate to "SSH".
- Choose "Yes" to enable SSH.
- Reboot your Raspberry Pi for the changes to take effect.
Alternatively, you can enable SSH by creating an empty file named "ssh" on the boot partition of your Raspberry Pi SD card.
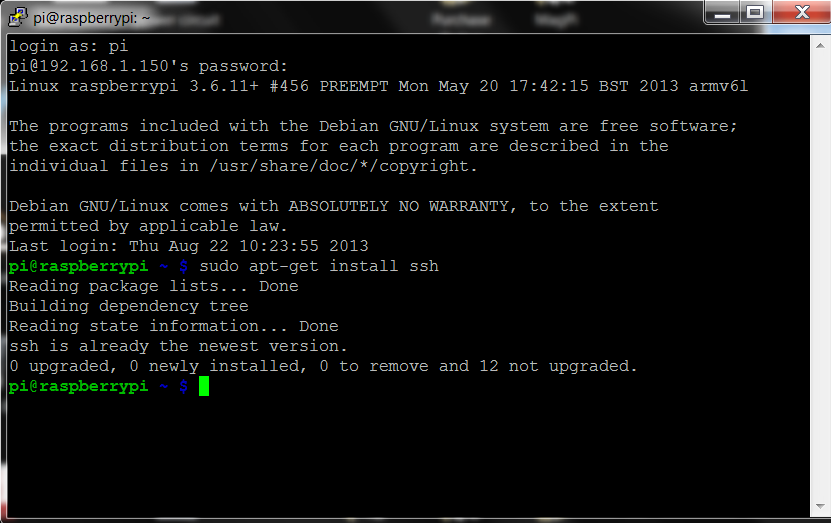
Connecting to Raspberry Pi via SSH
Once SSH is enabled, you can connect to your Raspberry Pi from another computer. Here's how:
Using Terminal (Mac/Linux)
1. Open the terminal on your Mac or Linux machine.
2. Type the command: ssh pi@.
3. Enter the password when prompted.
Using PuTTY (Windows)
1. Download and install PuTTY on your Windows machine.
2. Open PuTTY and enter your Raspberry Pi's IP address in the "Host Name" field.
3. Set the port to 22 and select "SSH" as the connection type.
4. Click "Open" and log in with your Raspberry Pi credentials.
Handling Dynamic IP Addresses
Many home networks assign dynamic IP addresses to devices, which can complicate remote access. To address this issue, consider using a Dynamic DNS (DDNS) service. DDNS automatically updates your domain name to match your current IP address.
- Popular DDNS services include No-IP, Dynu, and DuckDNS.
- Set up a DDNS client on your Raspberry Pi to keep your domain name updated.
Configuring Port Forwarding
Port forwarding allows external devices to access your Raspberry Pi through your router. Here's how to configure it:
Steps to Configure Port Forwarding
- Log in to your router's admin interface.
- Locate the "Port Forwarding" or "Virtual Servers" section.
- Create a new rule to forward port 22 to your Raspberry Pi's local IP address.
- Save the changes and restart your router if necessary.
Enhancing SSH Security
While SSH is secure by default, additional measures can further protect your Raspberry Pi from unauthorized access:
Change the Default SSH Port
Changing the default SSH port (22) can reduce the risk of automated attacks. To do this:
- Edit the SSH configuration file:
sudo nano /etc/ssh/sshd_config. - Change the "Port" value to a non-standard number, such as 2222.
- Restart the SSH service:
sudo systemctl restart ssh.
Disable Root Login
Disallowing root login prevents attackers from gaining administrative access. To disable root login:
- Edit the SSH configuration file:
sudo nano /etc/ssh/sshd_config. - Set "PermitRootLogin" to "no".
- Restart the SSH service.
Common Issues and Troubleshooting
Even with careful setup, issues can arise when using SSH. Here are some common problems and their solutions:
Connection Refused
If you receive a "Connection refused" error, ensure that:
- SSH is enabled on your Raspberry Pi.
- Your IP address is correct.
- Port forwarding is configured properly.
Timeout Errors
Timeout errors often indicate network issues. Check that:
- Your Raspberry Pi is connected to the network.
- Your router allows incoming connections on the SSH port.
SSH Tools and Clients
Several tools and clients can enhance your SSH experience. Some popular options include:
- OpenSSH: A widely-used SSH client included in most Linux distributions.
- PuTTY: A free and user-friendly SSH client for Windows.
- Termius: A cross-platform SSH client for mobile and desktop devices.
Choosing the right tool depends on your operating system and personal preferences.
Conclusion
SSH is a powerful tool for managing your Raspberry Pi remotely, and with this guide, you should now have the knowledge to set it up and use it effectively. Remember to prioritize security by implementing best practices such as changing the default port, disabling root login, and using strong passwords.
We encourage you to share your experience with SSH in the comments below. If you found this article helpful, don't forget to explore other tutorials on our website. Happy tinkering!
Sources: